Posts

Basic videos guide for using ETprocess (1~5)

1. [ETprocess] Creating Account 2. [ETprocess] Entering Database (Customer, Vendor, Employee) 3. [ETprocess] Creating Child Project (One Single Project) 4. [ETprocess] How to Hand Off (HO) 5. [ETprocess] How to Complete Each Step

Basic workflow on ETprocess

Image
 The basic workflow on ETprocess is as follows: 1. Create a project If you have a long-term project, you need to select a parent project. If it's an intermittent and short-term project, please select a child project. If a subsequent project is necessary to proceed, a PM (or sub-PM) can add a sub-project. 2. Assign the task to the resources If a project is created, you need to assign one of the tasks included in the project to one of the resources in the database. Once the task is assigned to someone, you may add a sub-assignee to assign the subsequent task. 3. Issue the PO Once a task is completed (click the CPL button), a PM (or sub-PM) has to issue the PO for the assignee.  4. Deliver the project If all the tasks are completed, a PM (or sub-PM) can make the project status delivered by clicking the Deliver button. 5. Receive the PO and Issue the Invoice If the customer issues the PO for the project, a PM (or sub-PM) needs to enter the PO number in the PO NO column. Doing this...

Prerequisites for successful use

Image
Many users report that the registration email with the link is not properly received at their email boxes. To prevent this, a user must exclude the domain "etprocess.com" from the spam filter. In other words, "etprocess.com" should be listed in the allowlist. 

How to issue a PO with a changed amount

Image
  If changing the PO amount is necessary, a user just needs to enter the values such as volume, unit rate, D/C (%), and the price in the red boxes above when reissuing the PO after canceling.

Guide to the figures on the dashboard

Image
  SALES DISTRIBUTION  The 3 customers with the highest sales in the year given MONTHLY TOP 3 CUSTOMERS WITH HIGHEST SALES The 3 customers with highest sales at the month given in the year when is set on SALES DISTRIBUTION FINANCIAL PROCESS STATUS The total amount by the financial process status Ordered : The total amount that customers ordered to the user Invoiced : The total amount that a user issued the invoices to the customers  Paid : The total amount that customers paid for the user Unpaid : The total amount that customers didn't pay for the user TOTAL SALES The total amount that a user issued the invoices to the customers in the year given on SALES DISTRIBUTION TOTAL COST The total amount that a user paid for the vendors in the year given on SALES DISTRIBUTION GROWTH (YoY) The sales growth rate compared to the same period last year GM Gross Margin, which is calculated from the total sales and total costs Note) This is different from the GM (%) in the project list, w...

How is [Assignee View] used?

Image
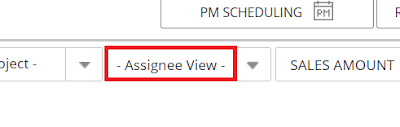
  [Assignee View] is one of search options used to sort projects in the project list by Assignee type (“Vendor” or “Employee”). Under [Assignee View], select Vendor Only to display only the Vendor’s task from the screen, or Employee Only to display only the Employee’s task.

How to search for only the projects with a specific project number by using a keyword

Image
This introduces how to search for only the projects with a specific project number by using a keyword. 1. Enter a keyword in the above area of [PROJECT NAME].  2. Among the projects displayed, click the specific project number necessary to be sorted out.  3. Click the [Clear All] button below to delete the keyword in the search results. 4. Click the [Refresh] button below to initialize the search results.

Entering the sales and cost amounts directly from the project list

Image
A user can change the sales and cost amounts directly from the project list. Although you've already created a project and sent the job request to a resource, you can directly revise the project list's values by double-clicking the cells to be touched. Please be noted that doing this can make some stats (EXP EXT COST, ETC, and EXP GM, etc.) changed accordingly.   

How to easily check the financial stats by period

Image
 If you want to check how much sales the company has this month, you may click the [THIS MONTH] button on the top of the project list. You can click [THIS MONTH] to display the search results and then click the arrows outside [Start Date] and [End Date] to display the search results for the previous month and the next month.   This is also working the same at [TODAY] and [THIS YEAR] buttons. If you want to clear the search results, you may click the same button as you did once again. 

AP APPROVAL > EXPORT TO EXCEL (FINANCE)

Image
  [EXPORT TO EXCEL (FINANCE)] is a function that can sort the PO-issued details by a vendor. The exported sheet contains NAME, TOTAL AMOUNT, CURRENCY, TOTAL PRICE (amount to which an exchange rate is applied), ACCOUNT HOLDER, BANK NAME, ACCOUNT NO, SWIFT CODE, and BANK ADDRESS. With this function, a user can easily check how much it is to make each vendor's payment.

What is the folder-shaped icon?

Image
This folder-shaped icon is to open the path of the project files. Most of the paths are public folders with which employees can share the files such as sources and references. In order to use this function, a user must install (add) a chrome extension program named "Local Explorer." It can be downloaded from the following URL: https://chrome.google.com/webstore/detail/local-explorer-file-manag/eokekhgpaakbkfkmjjcbffibkencdfkl After installing the program, a user needs to set the default as follows: A user can enter the path by clicking the icon; as the folder-shaped icon is changed to a clickable icon once a path is entered, it needs to open the text area by pressing the [Enter] key in order to revise the path. Please see below the video showing how to enter the path.

What does "ETC" mean?

Image
[ETC]  is a relatively complicated index that many users have no idea about it. To process a project, we need external costs such as translation fees and internal costs like employees' time spent. "ETC" is the sum amount of these costs. If a user issues a PO, the external cost is updated and deducted from the sum amount above. * ETC = (EXP EXT COST + EXP INT COST) - (EXT COST+INT COST) In other words, it is the expected costs left that a user needs to complete the project.  By the way, when a project is finished, the costs can be changed due to some circumstances. In this case, a user may adjust the ETC's value to "0", which expresses "no more costs necessary."  And a user can check the project's completion rate with this index. The status of "no more costs necessary" means that the project is completed 100%.  "ETC" is an abbreviation of "Estimation To Completion," which means the expected costs left to complete th...

When is the notification email sent?

Image
  Case  Recipient Email title Write Task Request Who is included as a recipient [Writer] Task Request: Pxxxxxx (Project number) – Project name Accept for handoff PM, SUB PM [Writer] Task accepted: Pxxxxxx –  Project name Decline for handoff PM, SUB PM [Writer] Task declined: Pxxxxxx –  Project name Handback PM, SUB PM, Sub-assignee [Writer] Handback: Pxxxxxx – Project name PO issuance PO recipient (vendor) [Writer] PO: Pxxxxxx – Project name Decline for PO PM, SUB PM [Writer] PO declined: Pxxxxxx - Project name Create query POC/BD, PM, SUB PM, Sub-assignee [Writer] Query: Pxxxxxx – Project name Note)  A confirmation email for PO is not sent.

Resend a task request

Image
  Once a task request is sent, the [Send] button is changed to [Resend]. A user can resend an updated task request by clicking this button.  The details written in the previous request can be checked on the [Write Task Request] window, but as the vendor information is already displayed on the project line, it's not included in the [Resend] window. Please note, when resending is performed, the existing request contents (due date/time, TASK STATUS, and PROJECT STATUS, etc.) are displayed on the project list until the new request is confirmed.

ETprocess QSG (Quick Start Guide) for Vendor Users

Image
  <Please click the image to view in the original size with better visibility.>

Set up (update) currency

Image
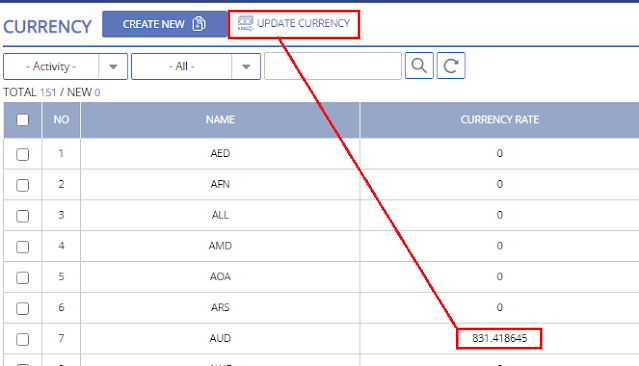
A user can set up the currency by clicking the [UPDATE CURRENCY] button manually on the [SETUP] - [CURRENCY] menu. It is updated based on European time as it is taken from the European Central Bank. If a user wants to get more accurate data into ETprocess, Updating currency daily is necessary. 

Optimizing View Setting

Image
A user can change the view setting to optimize how the project list looks like. Click [VIEW SETTING] and uncheck the columns you don't want to show on the project list. Doing this can relieve you of the inconvenience while you scrolled right and left to check the whole screen. Notice: For some resolution environment, the project list's table layout may seem broken. 

How to display only the projects I participate in

Image
At the top menu of the project list, a user can select his/her role checkbox(es) to display only the projects he/she participates in.  If a user selects [Writer], only the projects the user writes are displayed on the project list. The default is that all the checkboxes are not selected, which means that a user can see all the projects as long as he/she gets the right.

How to enhance the visibility of the project list featured a wide scroll range

Image
Clicking this "minus-shaped" button can make part of the top menus folded until the next button. A user can use this function to build a customized work environment to enhance the project list's visibility and feature a wide (right and left) scroll range. 

Efficient and strong availability record/check function

Image
ETprocess has an efficient and strong availability record/check function. 1. An external resource (assignee) can update the schedule in the [AVAILABILITY] menu. 2. The updated schedule is displayed in the [RESOURCE SCHEDULING] window when clicking the [RESRC SCHEDULING] button on the project list's top menu. 3. An internal resource (assignee or employee) can also update the schedule by writing an application at the [APPLICATION] menu in the navigation bar on the left side. 4. The written application is forwarded to the leader of the team the writer belongs to. 5. If the team leader confirms the application, the schedule is updated according to the application's content. All the tasks are displayed in the form of graphics in the [RESOURCE SCHEDULING] window. The assigned project information such as volume and duration, etc. are shown; therefore, it is possible to allocate equally to a certain extent from the project manager's standpoint. + PM SCHEDULING Like [RESRC SCHEDULIN...